Tutorial: New Features in Adobe Premiere Pro CC
Today Adobe announced updates to all Creative Cloud video apps that will debut at NAB. 以下是最新消息的详细内容, plus a video tutorial on four key new features in Premiere Pro CC: 掌握剪辑, 生活的文本, 掩蔽和跟踪, 以及新的4K格式支持.
在本教程中 I’ll show you the four key new features in Adobe Premiere Pro CC. 首先是掌握剪辑.
掌握剪辑
你可以看到 图1(下面), I’ve used the Twirls clip 4 times in the Twirls sequence. 回顾时间线上的录像, it looks like it could use a little more brightness and contrast. 使用以前版本的Premiere Pro, I’d have to add the Brightness and Contrast adjustments to each instance of the clip in the timeline individually.

图1. The Twirls clip appears 4 times in this timeline. 单击图像以查看其全尺寸.
The new 掌握剪辑 feature allows me to make the adjustment much more quickly.
First, I select the Twirls clip in the Project panel and press F to open it in the Source Monitor. Then I click the Effects tab and choose Video Effects > Color Correction > Brightness & Contrast and drag it into the Project panel, and drop it on the Twirls clip. 现在, if I go to the Effect Controls panel, I can see that the Brightness & Contrast effect has been added to Twirls in the Project panel (not just the selected clip in the timeline).
现在, if I make a Brightness adjustment to the Twirls clip in the Project panel (an excessive one to underscore the point, 如图所示 图2), the adjustment is reflected in all instances of the clip in the timeline.

图2. The Brightness adjustment I made to the Twirls clip in the Project panel has been applied to all instances of the clip in the sequence. 单击图像以查看其全尺寸.
This new feature is very convenient if you’re using one clip in multiple places and need to apply an adjustment to all the places it appears in your project.
掩蔽和跟踪
接下来是掩蔽和跟踪. Basically, every effect in Premiere Pro now comes with masking. So let’s say I want to do a Witness Protection Program effect on the dancer in my clip and blur her face. 为此,我将使用马赛克效果. I choose Effects > Video Effects > Stylize > Mosaic, then drag it onto the clip in the timeline, as I would in previous versions of Premiere Pro.
When I open the Effect Controls panel to customize the effect, directly under Mosaic I see ellipse and square buttons (下面的图3) that allow me to create an ellipse or square mask and apply the effect as such.

图3. Clip the ellipse button under the effect to create an ellipse mask.
When I click the ellipse button, Premiere Pro creates a mask in the clip in the sequence 如图所示 图4(下面).
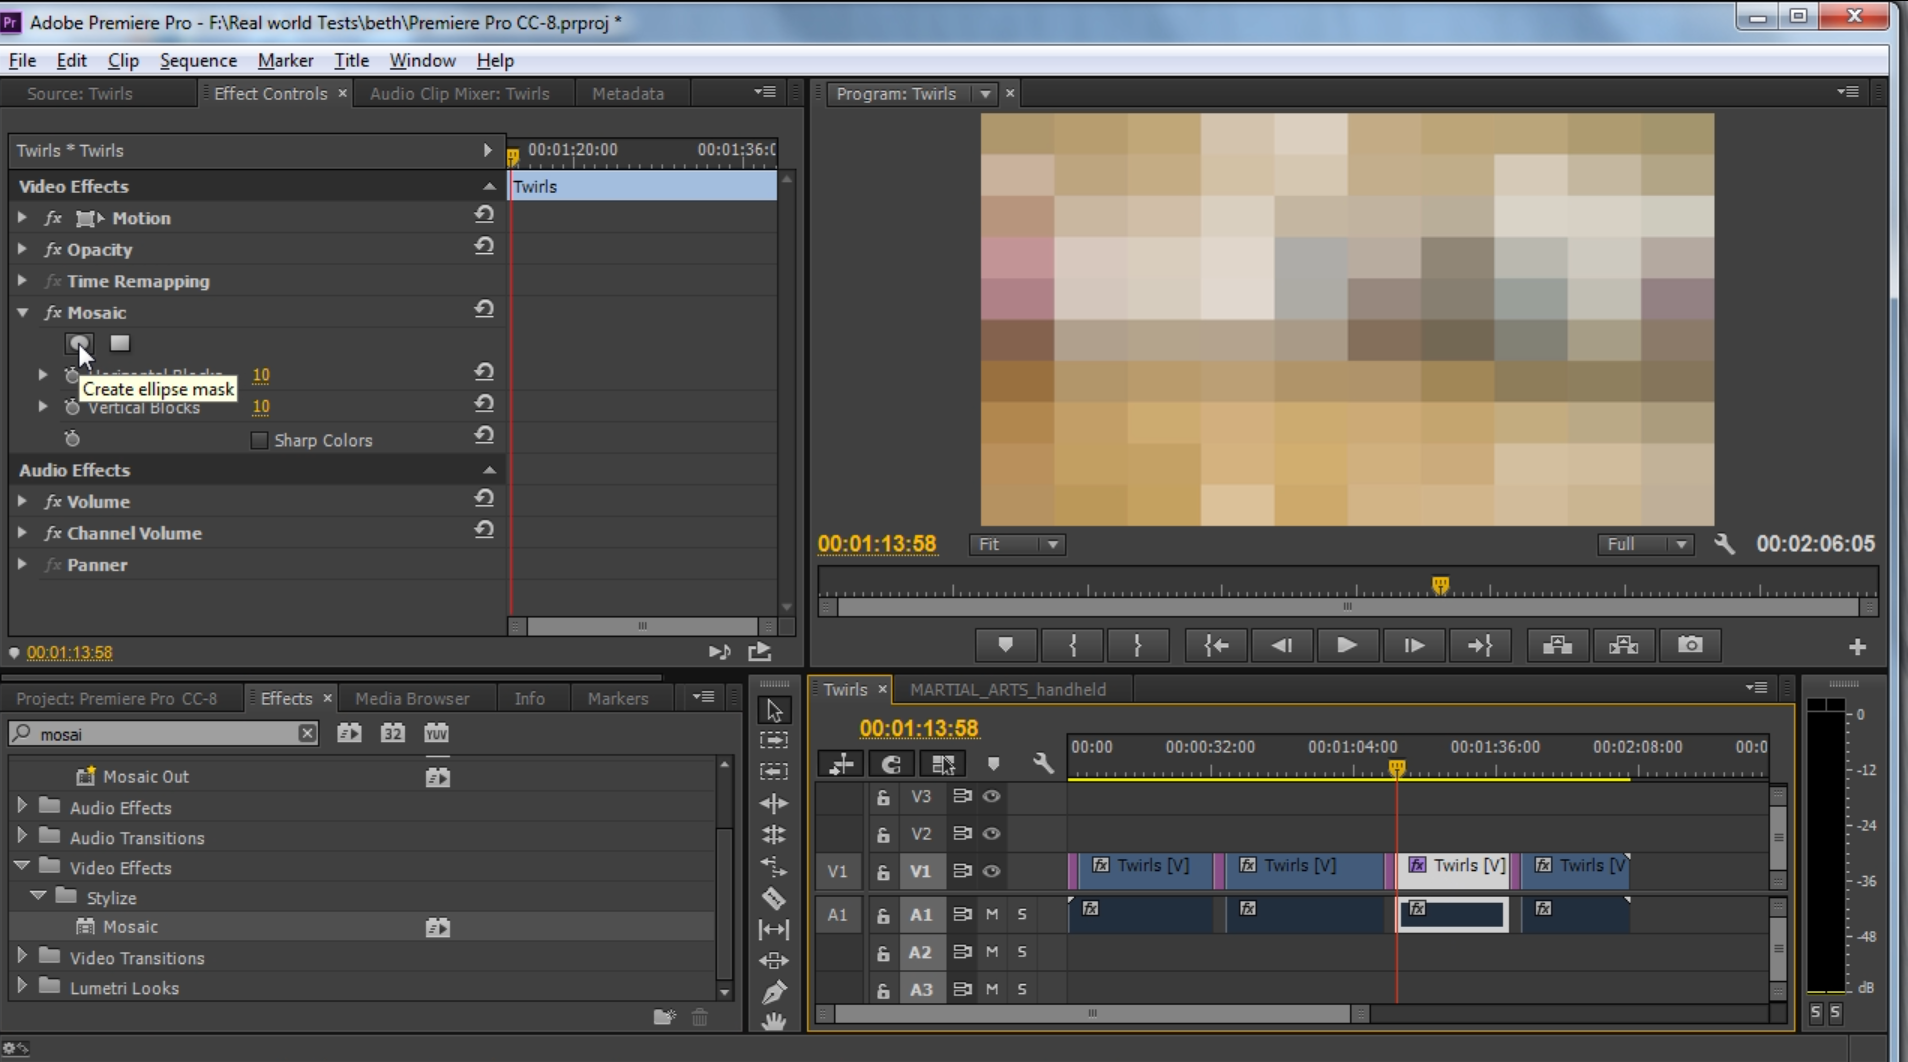
图4. 应用于剪辑的椭圆蒙版. 单击图像以查看其全尺寸.
下一个, I zoom in on the image and size the mask for the face using the bounding controls on the ellipse (下面的图5).

图5. The ellipse mask resized to cover only the face.
So far, all we’ve done is isolate the mask on her face. This works great at this particular frame, but what happens when she moves? 这是效果的跟踪部分.
来跟踪蒙版, 回到效果控制面板, and under Mosaic > Mask, click the play button to the right of the Mask Path, 又名“轨道选定掩码向前”(下面的图6).

图6. 点击这里跟踪遮罩.
将打开跟踪进度窗口, and a process that used to be performed in After Effects is now performed in Premiere Pro. You can watch the mask track the subject’s movements as the tracking process progresses. As you can see around the 2:58 mark in the video at the beginning of this article, as the dancer starts moving around the floor, 面具或多或少跟随着她的脸. 如果你看到它偏离轨道, 您可以停止该进程, correct it by moving the mask manually back to her where her face is, then click the play button again to resume the tracking at the point at which you stopped it.
一旦过程完成, you can watch the mask follow the dancer’s face as she moves across the floor. So again, not only do you get the masking with the effect, but the tracking as well. In previous versions, you would have had to use After Effects to track the mask.
相关文章
This tutorial demonstrates how to use an After Effects alpha matte to make your video "shine through" your text.
New After Effects features include additional keying effects, Kuler集成, and the ability to create live text templates and to share masks with Premiere Pro; Photoshop gets more powerful Smart Objects, Improved Layer Comps and Content-Aware technology, 模糊画廊运动效果, 和焦点蒙版
新闻 includes major updates to Adobe Premiere Pro CC and Adobe After Effects CC and new features for Adobe Anywhere, the collaborative workflow platform that empowers teams using Adobe professional video apps to work together as they access and manage centralized media and assets across virtually any 网work
在本教程中, we'll look at how to create screencams with TechSmith Camtasia, and then import them into Adobe Premiere Pro to incorporate them into your existing Premiere Pro projects to create professional-quality instructional videos that seamlessly combine screencams and HD footage.
Here are three quick tips that will streamline your titling workflow in Premiere Pro when you create styles you like and want to use them consistently without reinventing them each time.
SpeedGrade的新speedlook, 面具跟踪在After Effects, 同步设置在Adobe媒体编码器, 改进的多镜头在Premiere Pro, 扩展的超高清/4k支持, 和更多的
Using Adobe Lightroom 5 to color-grade and apply metadata to DSLR video files is simple and efficient and can benefit live-switchers doing minimal edits, 编辑新手, and pro editors exploring non-traditional workflows.
While After Effects may be daunting for some Premiere Pro editors, here is an easy-to-follow workflow that can enliven your text and titles with pre-built animations found in Adobe Bridge, applied in a few simple steps in After Effects, and imported directly into your Premiere Pro timeline.
Recent upgrades to Adobe CC make it easy to apply graded looks in Adobe Premiere Pro CC and match shots with different color temperatures via seamless roundtripping between Premiere Pro CC and SpeedGrade CC.
In this final round between audio editing champs iZotope RX 3 and Adobe Audition CC, we compare the two audio editors in noise reduction and reverb/echo reduction.
In this first installment of a two-part series, 1月时 compares the declipping and crackle and pop-removal features in iZotope's new RX 3 pro audio editor to the parallel features in Adobe Audition CC.
Exploring 3 new key features in Audition CC, the newest version of Adobe's professional audio editing application: Sound Removal for eliminating hums and other variable-frequency unwanted noises, the Loudness Radar Meter for matching and adhering to broadcast volume standards, 和自动语音对齐ADR.
If you ever find yourself having to render multiple sequences from Premiere Pro, there's an easier way to do it than by using the Premiere Pro Export control. This tutorial will explain the easier 和更多的 efficient way using Adobe Media Encoder.
Here's a quick tutorial for Premiere Pro CC users on how to migrate encoding presets that you created to customize and streamline encodes in Adobe Media Encoder CS5/6 into Adobe Media Encoder CC so you can pick up right where you left off.
在本教程中 you'll learn how to create and edit industry-standard closed captions for video using the new closed-captioning capabilities in the just-released Adobe Premiere Pro CC.
Two types of noises degrade the audio you shoot with your video: random noises like microphone clicks and pops, and consistent noises like white noise or air conditioning hum. This tutorial demonstrates how to remove both of them in Adobe Audition CS6.